Pop Up Trailer: Complete Buyer’s Guide
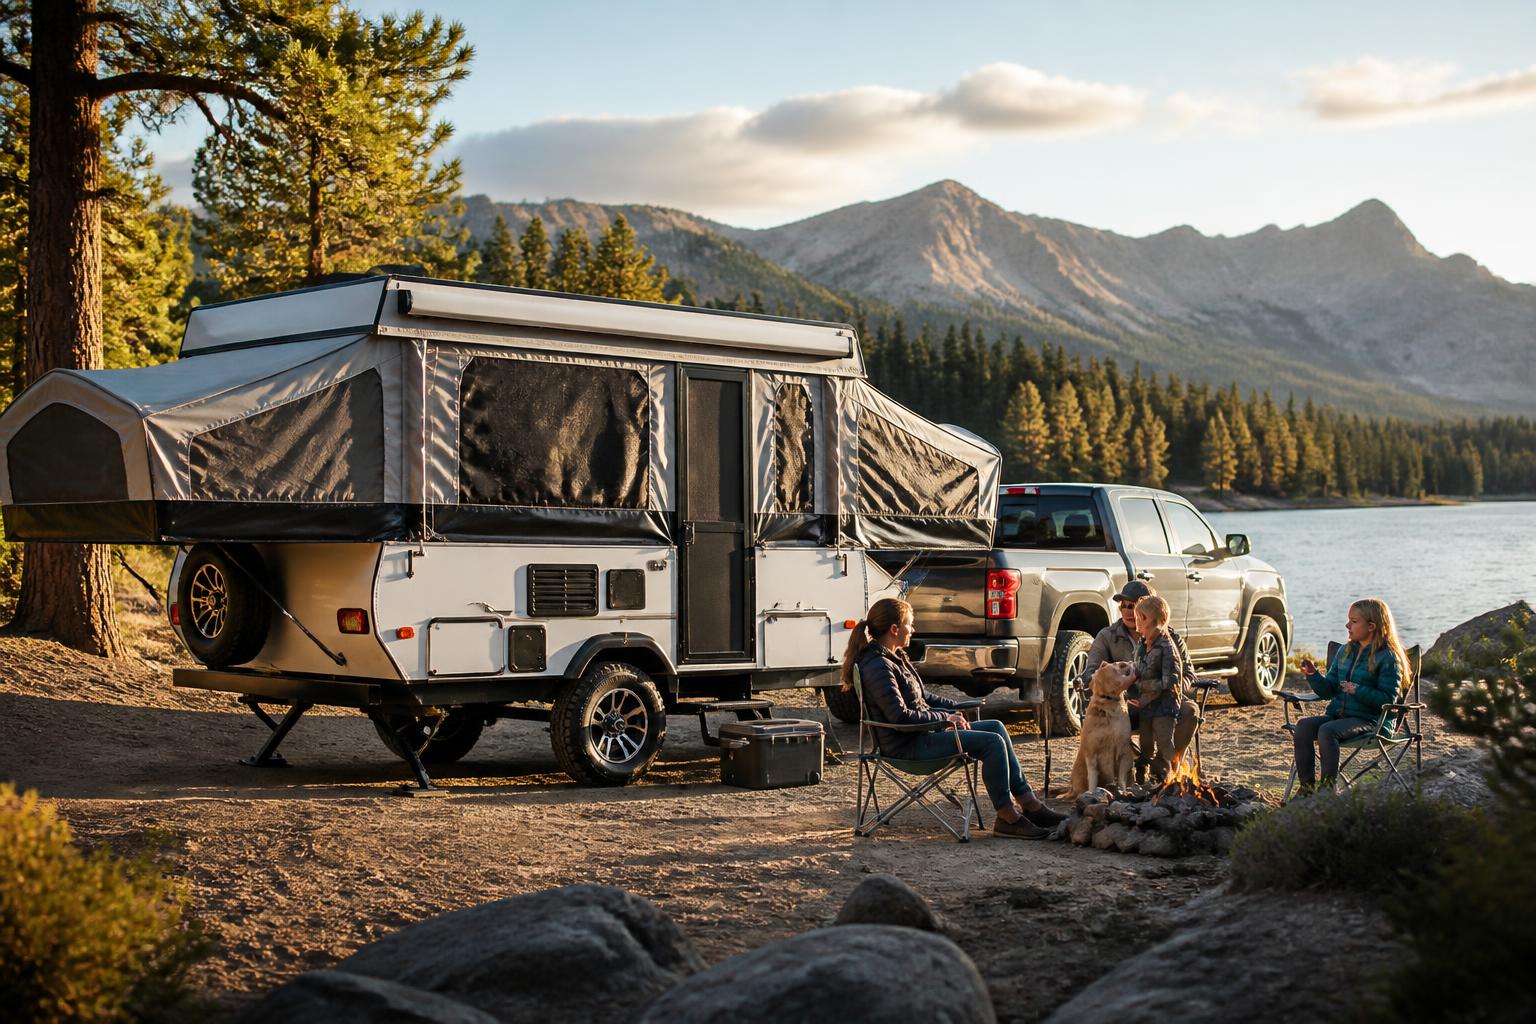
A pop-up trailer (folding camper or tent camper) is a lightweight, collapsible RV that expands into a tent-like living space with hard floor panels and fold-out beds. Its core advantage: it tows low and stores compact, making it accessible to vehicles that can’t handle a full-height travel trailer. The trade-offs: limited insulation, 15–30 minute setup time, and a fabric structure that demands regular maintenance. This guide walks through the ownership realities, the one failure mode that catches most buyers off guard, and how to decide if it fits your camping style.
Seven Questions to Decide If a Pop-Up Fits You
Run through these seven points before you start shopping. A “no” doesn’t automatically disqualify you, but it flags a serious mismatch.
- Can you tolerate a 15- to 30-minute setup and teardown in rain, dark, or both? If you want to arrive and sleep immediately, a pop-up isn’t it.
- Do you camp mostly in mild weather? Canvas offers little insulation. Below 40°F at night feels cold; above 85°F turns the interior into a greenhouse. A portable AC helps but adds weight and power demand.
- Does your tow vehicle have a rating of at least 2,000 lbs (preferably 3,500+)? Many pop-ups are light, but once you load gear, water, and a battery, both tongue weight and total GVWR climb. Ignore dealer claims like “you can pull that with a Corolla.”
- Can you store it at home, either in a garage or under a weatherproof cover? It will get scratched, faded, and wet. The roof and canvas are the most vulnerable parts.
- Do you plan to camp without shore power? Most pop-ups come with a single deep-cycle battery and a small converter. Running a furnace fan all night drains it in 8–10 hours. Solar is an add-on, not standard.
- Can you inspect the roof and canvas before every trip? Routine checks catch small leaks before they rot the plywood floor or frame.
- Are you comfortable replacing canvas and crank lift cables yourself? Dealer repairs run $500–$1,500 for new canvas or a lift-system rebuild. If you aren’t handy, budget for those services.
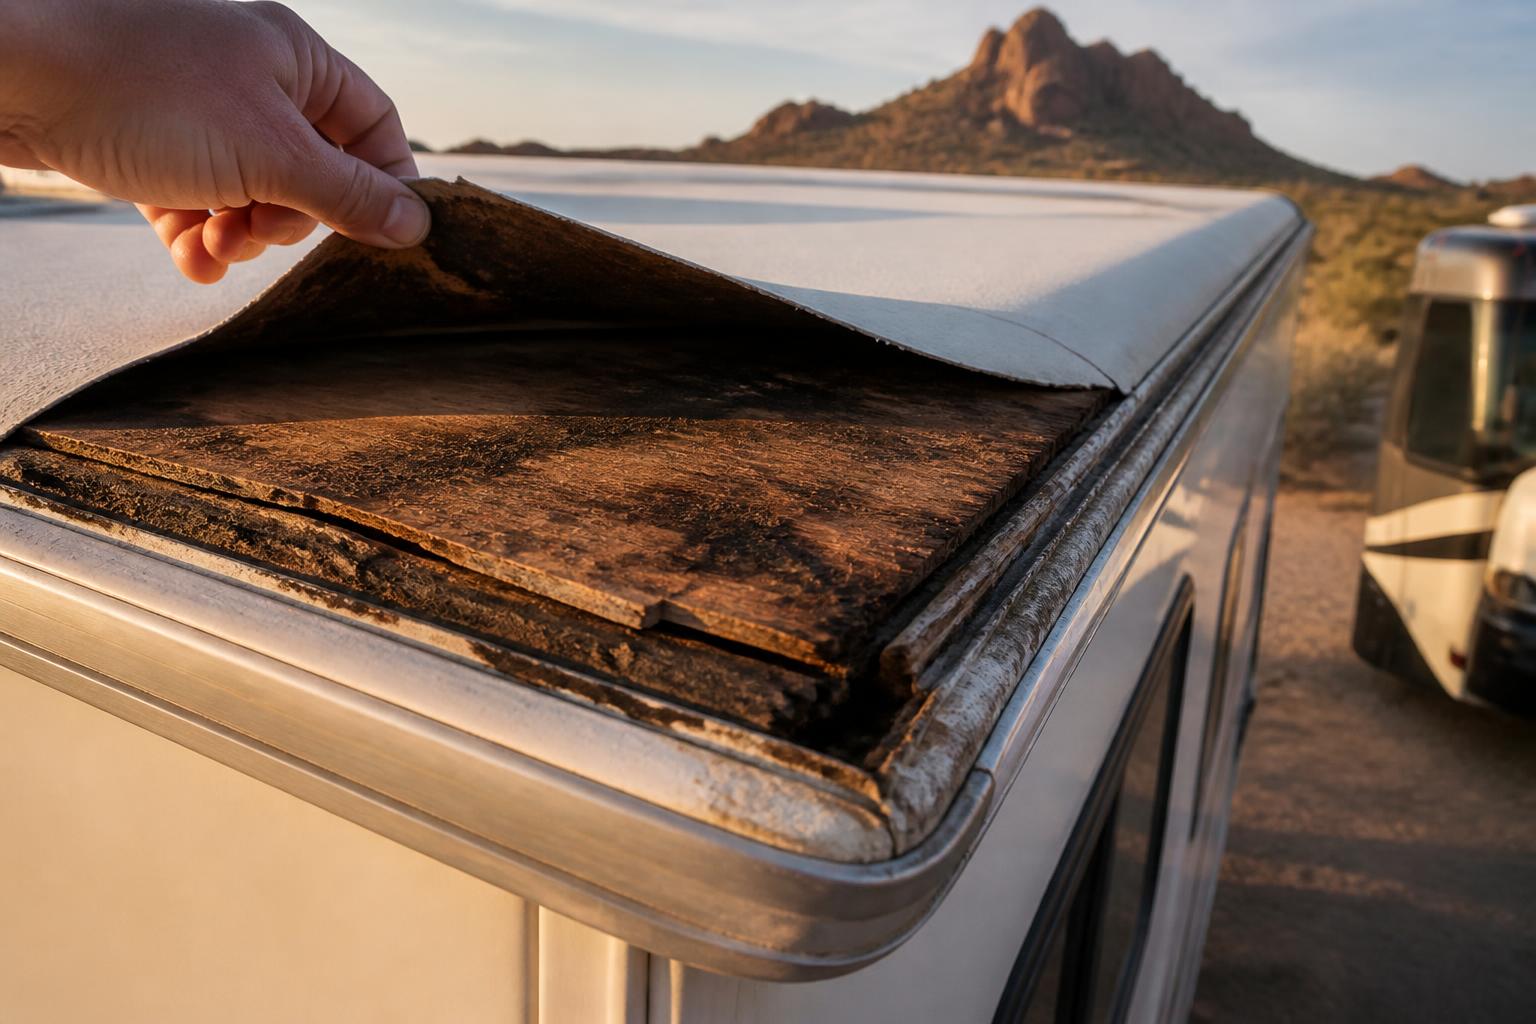
The Hidden Roof Damage That Kills Most Pop-Ups
The most common killer is hidden water damage from the roof. Unlike a hard-sided travel trailer, a pop-up roof is a thin sheet of aluminum or fiberglass over a plywood core, often with rubber or vinyl membrane seams. Seams crack, the roof flexes, and water seeps into the wood. Once the plywood delaminates, the roof sags, the lift mechanism binds, and the trailer is structurally compromised. Floor rot follows.
How to detect it early:
- Press down firmly on the roof interior (both panels, if it’s a two-piece roof). If the material feels spongy or gives under pressure, the plywood is rotting.
- Look for wavy or discolored ceiling liner inside. Brown streaks or bubbling point to water entry.
- Check the bunk-end canvas corners and the Velcro attachments. Peeling or swollen wood trim there means water has been running down the side.
- Smell the interior when the trailer is closed for a few days. A musty, mildew odor that isn’t just canvas moisture signals mold behind the wall panels.
- Inspect the lift cable pulleys mounted on the roof. Rusted screws or cracked plastic around them indicate the roof has been soaking up moisture.
Practical implication: If you find any of these signs during a used unit inspection, walk away. Roof replacement on a pop-up often costs more than the trailer’s used value ($2,000–$4,000). If the roof is sound but the cables are frayed, budget $100–$200 for a DIY cable kit and plan to replace them within the first season.
What a Pop-Up Trailer Does (and Doesn’t Do)
A pop-up typically measures 8 to 16 feet closed, weighs 1,200 to 3,500 lbs loaded, and sleeps 4 to 8 people with the bunk ends extended. The roof lifts manually or with a crank to create headroom; side walls are canvas or vinyl. Most have a small kitchen, a dinette that converts to a bed, and sometimes a cassette toilet or portable shower. Tow-vehicle requirements are moderate: a midsize SUV or minivan with a factory tow package can handle most models.
Applicability boundary: This description applies to conventional folding campers produced from the 1980s through today. Newer models (2010+) often have thicker roof insulation, electric lift options (still rare), and one-piece ABS roofs that are less prone to water intrusion. Pre-2000 models with aluminum siding and separate roof panels are more vulnerable to the water damage described above. If you’re considering a high-wall pop-up (like a Flagstaff High Wall or Rockwood High Wall), expect higher tow weights (up to 4,000 lbs) and better insulation, but the same inspection and maintenance demands.
The biggest advantage is storage. When collapsed, a pop-up fits in a standard garage or next to a house. That alone makes it a realistic option for campers without dedicated RV parking.
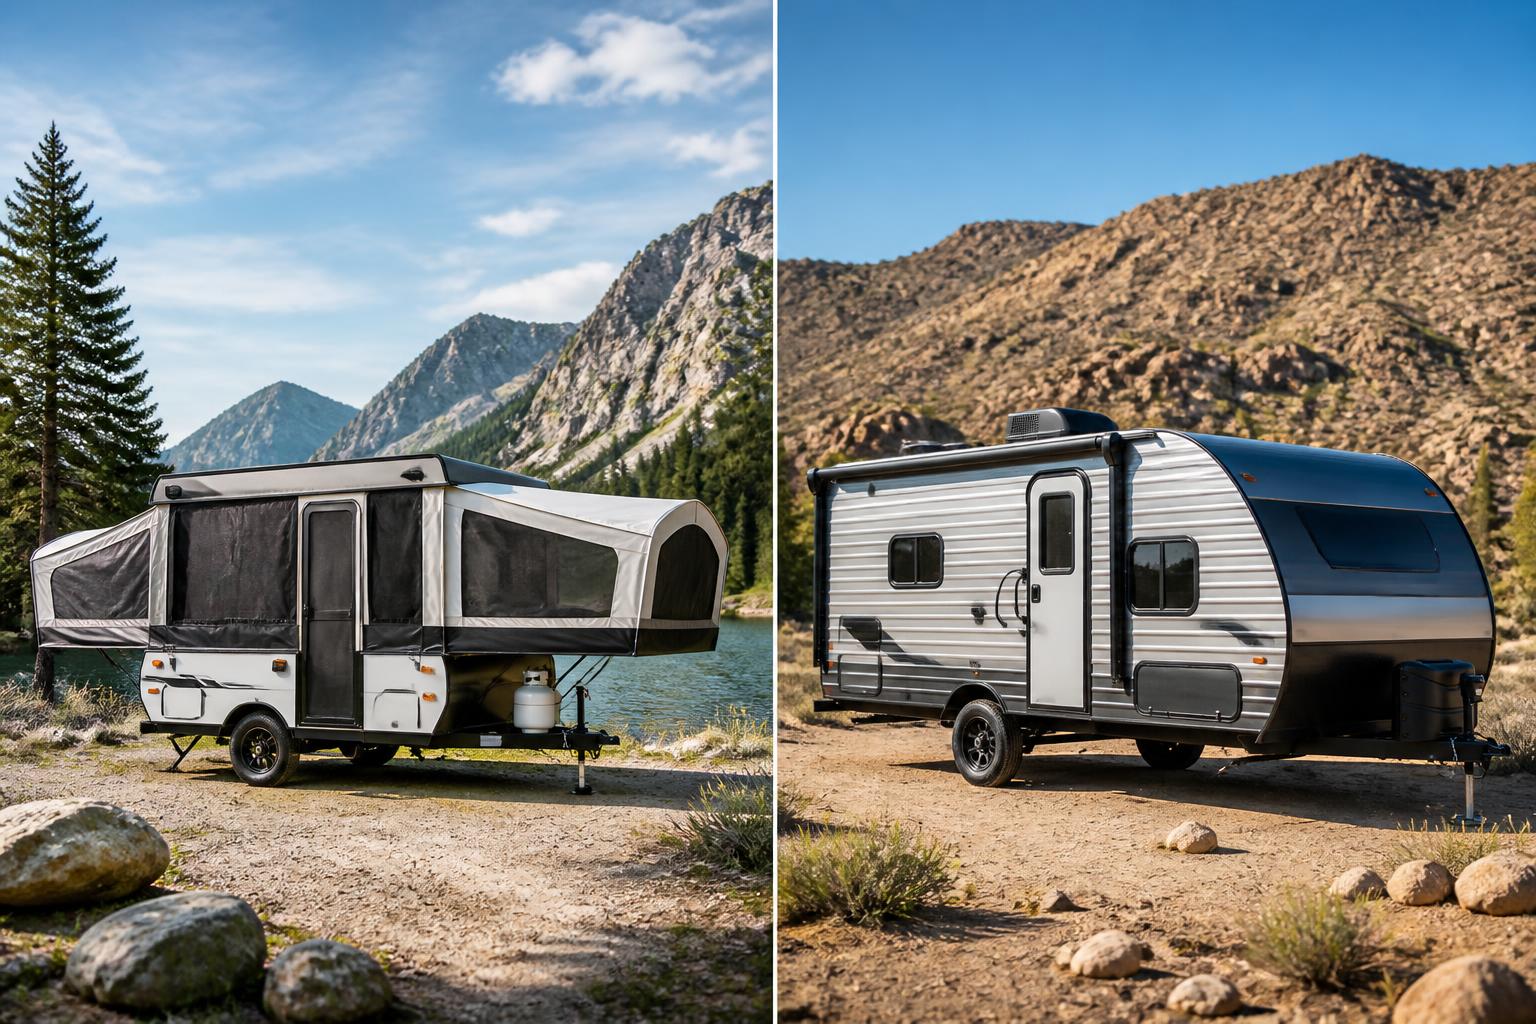
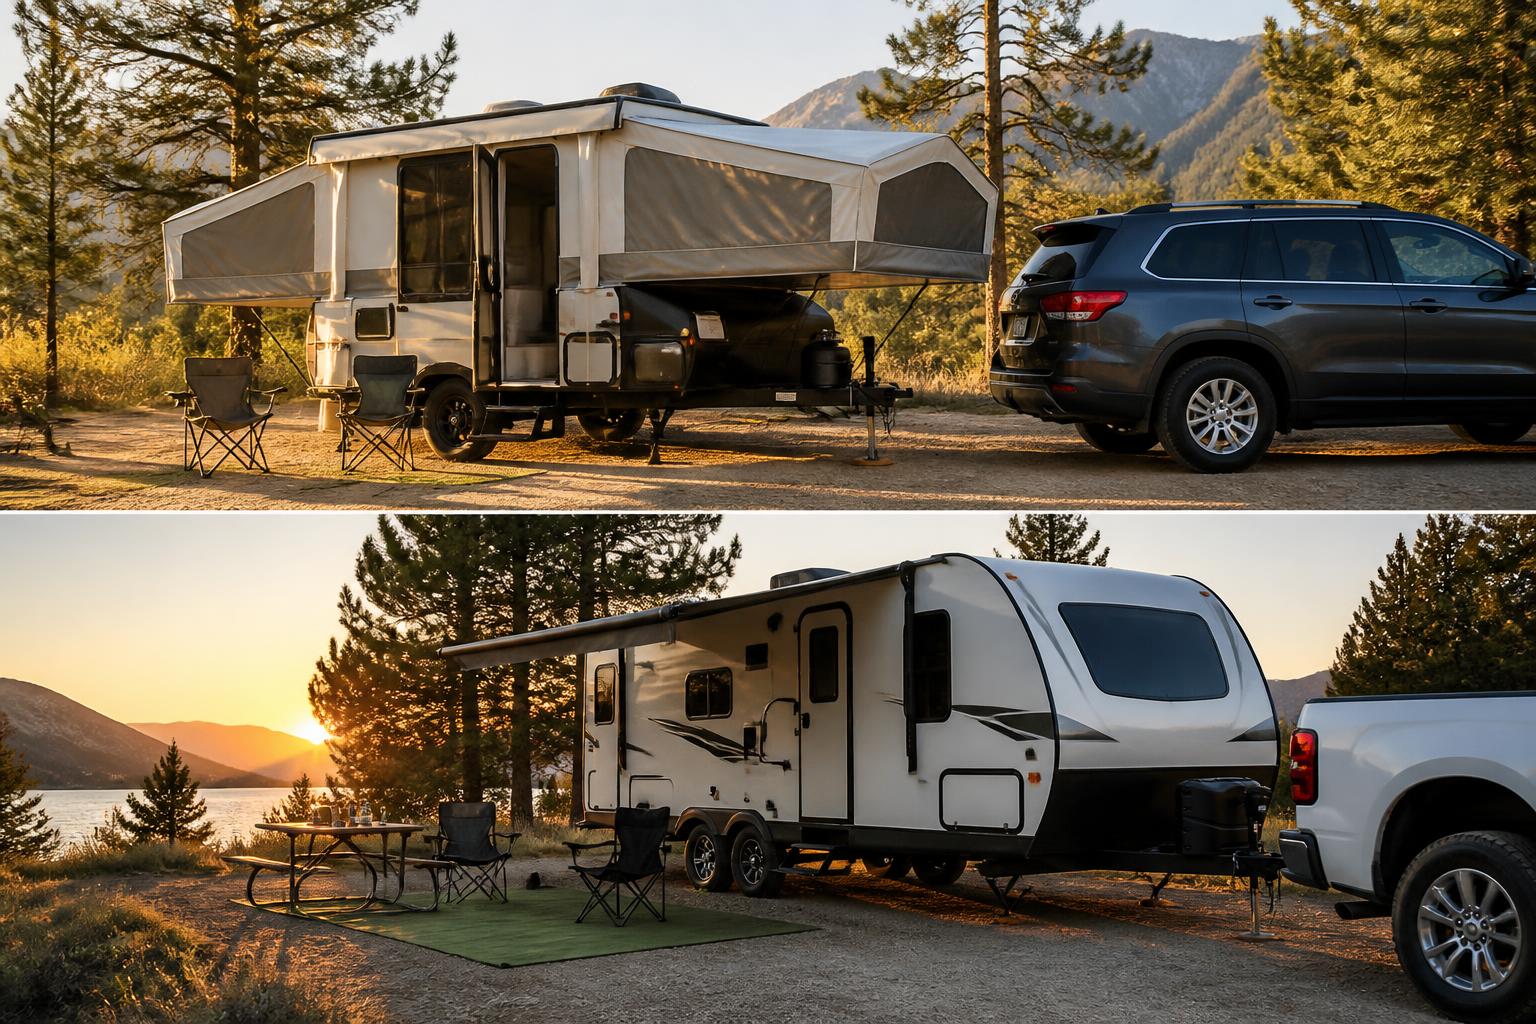
Pop-Up vs. Small Travel Trailer: When Each Works Best
The closest alternative is a small travel trailer (16–20 feet, 2,500–4,000 lbs). Here’s where a pop-up still wins and where it loses.
| Factor | Pop-Up Trailer | Small Travel Trailer |
|---|---|---|
| Tow vehicle needed | Midsize SUV/minivan (3,000–4,000 lb capacity) | Full-size SUV or half-ton truck typically |
| Setup time | 15–30 minutes | 5–10 minutes (level, unhitch, stabilize) |
| Headroom inside | Only when raised, limited ceiling height | Full standing room immediately |
| Insulation | Poor (canvas + thin roof) | Moderate to good (fiberglass/aluminum + foam) |
| Storage footprint | Fits in garage (folded) | Needs driveway or storage lot |
| Resale value | Depreciates quickly; worse if roof damaged | Holds value better |
| Initial cost | $5,000–$15,000 new, $1,500–$8,000 used | $12,000–$25,000 new, $5,000–$15,000 used |
When a pop-up makes sense: You have garage space, a modest tow vehicle, mostly summer or mild-weather camping, and you don’t mind the hands-on setup. You’re buying used and want the lowest entry cost into RV camping.
When it doesn’t: You camp in shoulder seasons or winter, need instant shelter after a long drive, or want hard walls for privacy and noise reduction.
Inspecting a Used Pop-Up: What to Look For
Perform the inspection on a dry, flat surface with the trailer fully set up. This operator flow catches the most common deal-breakers.
Preparation and Early Checks
- Check tires for date codes and cracks. Most pop-up tires are undersized and age out at 5–6 years regardless of tread.
- Look at the tongue jack and coupler. Bent or rusty parts suggest the trailer was dropped or poorly maintained.
- Pull a wheel bearing grease cap if possible. Dark, gritty grease means the bearings are shot.
Raising the Roof – Likely Causes of Binding
- Crank the roof manually one-handed without jerking. If it binds or you hear grinding, likely causes are frayed lift cables, a misaligned roof (often from water damage or a previous drop), or a seized crank mechanism.
- Stop at half height and check that both bunk ends extend evenly. Uneven extension indicates a sagging roof or worn crank mechanism.
- Inspect the lift cables at the pulleys. Frayed strands or cracked sheathing mean replacement soon ($100–$200 for a cable kit).
- Friction point: If the crank handle feels cross-threaded or slips, the crank gear may be stripped. That requires a new crank assembly ($50–$150).
Inside Inspection (Roof Raised)
- Press down on the roof interior as described earlier. Also push on the floor panels around the edges, especially near the bunk ends.
- Open every cabinet and lift every cushion. Look for water stains, soft wood, or rust on screws.
- Test the stove, furnace, water pump, and lights. A weak battery can mask electrical problems, so plug into shore power if possible. Concrete verification step: Use a multimeter to check the converter output (should be 13.2–13.8V at the battery terminals with shore power connected). If it reads below 13V, the converter may be failing.
- Check the bunk-end canvas for holes, tears, or missing zippers. Small holes can be patched, but torn seams or rotten canvas mean a $500–$1,000 replacement.
Lowering and Folding – Escalation Signals
- Lower the roof slowly and watch the canvas fold smoothly. If the canvas bunches or catches on the roof edge, the alignment is off. This often means the roof is twisted from water damage.
- Check that the travel latches engage without force. Forced closure means the roof doesn’t sit level.
- Escalation signal: If you can’t lower the roof without binding at two different points, the lift system needs professional service or the roof is structurally compromised. Walk away unless the seller has documentation of recent roof replacement.
Success check: If you can complete the crank operation twice without binding, and the canvas folds flat with no puckering, the mechanical core is sound. Then focus on the roof and floor condition—those remain the $2,000–$4,000 repair threshold.
Realistic Trade-Off: Slide-Outs and Add-Ons
Some pop-ups have a slide-out dinette that expands interior space. That adds 200–400 lbs, creates two additional seal points prone to leaks, and increases setup time. Avoid used pop-ups with slide-outs unless you can verify the slide seals are intact and the mechanism operates without excessive cranking effort. A failed slide-out can cost $1,000+ to repair and often requires dealer intervention.
Realistic Ownership Costs
Beyond the purchase price, budget for these recurring expenses:
- Canvas replacement every 10–15 years: $800–$1,500 (DIY) or $1,500–$2,500 (dealer installed).
- Lift cable replacement every 5–8 years: $100–$300 for parts.
- Tires every 5–6 years: $60–$120 each.
- Battery every 3–5 years: $100–$200 for a deep-cycle lead-acid.
- Winter storage: $200–$600 per season if you can’t garage it yourself.
- Annual maintenance: $100–$300 for sealant reapplication on roof seams, awning fabric conditioning, and bearing repacking.
Many owners spend 10–15% of the purchase price per year on upkeep. A $4,000 used pop-up can easily cost $600 a year in maintenance and repairs—not including campground fees.
Common Owner Complaints and How to Avoid Them
- “The crank breaks on the third trip.” Buy a spare crank handle and keep it in the tow vehicle. Check the crank bolt tension before every trip. Also lubricate the lift cable guides with dry spray lubricant once a season.
- “The canvas gets moldy after one rainy season.” Dry the canvas completely before folding. Never store it wet. Apply a waterproofing spray annually (303 Fabric Guard or similar).
- “The floor feels soft near the door.” That’s the most common water entry point. Install a rubber threshold mat and re-seal the door frame annually with Dicor lap sealant.
- “The furnace runs the battery dead overnight.” Install a second battery in parallel or use a portable generator for furnace-heavy trips. Or switch to a catalytic propane heater (like a Mr. Heater Buddy) with a CO detector.
- “I can’t pull it up to highway speed.” Check your tow vehicle’s GCWR, not just the trailer’s weight. A 1,800 lb pop-up behind a 3,000 lb rated minivan can still struggle on steep grades. Upgrade to a weight-distributing hitch if the manufacturer allows it.
A pop-up trailer is a valid entry into RV camping, but it demands more hands-on attention than its hard-sided cousins. If you go in knowing the roof inspection routine and accepting the setup time, you’ll avoid the biggest financial pitfalls and get years of affordable use. If you want a “just fill the water and go” experience, look at a small travel trailer or a van instead.
Practical RV guides from an experienced owner. Motorhomes, travel trailers, truck campers — we have owned them, maintained them, and written the guides we wish we had found when we started.